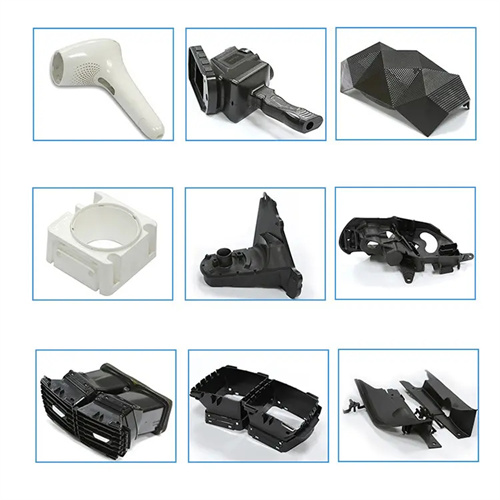
Mirror logos (logos) are a key aesthetic element of high-end plastic parts. Melt impact marks on their surfaces can severely impact the product’s quality. These defects manifest as radial or streaky shiny marks around or within the logo’s edges. These marks are caused by turbulent flow caused by the high-speed melt impacting the mold cavity surface. The mirror logo on the back cover of a smartphone was made of PC+ABS alloy. During initial production, the melt directly impacted the raised area of the logo, resulting in noticeable impact marks at the corners. The pass rate for visual inspections was only 72%. 3D mold scanning revealed a 95% correspondence between the impact mark locations and the melt impact points, confirming that melt impact was the primary cause. The occurrence of impact marks is also closely related to material fluidity and mold temperature. Insufficient fluidity prevents the melt from quickly conforming to the mold cavity surface, leading to turbulent flow. Excessively low mold temperature leads to rapid cooling of the melt front, exacerbating the solidification of the impact marks.
Optimizing gate location and form is key to eliminating impact marks on mirror logos. Direct melt impact on the logo area must be avoided, and the melt should be guided to fill the logo smoothly. A cosmetics bottle cap’s mirror logo originally used a direct gate, with the melt injected directly behind the logo. This impact mark resulted in an 18% rejection rate. The technical team modified the gate to a side gate and offset it 5mm from the logo’s center, allowing the melt to flow along the cavity wall to the logo area, creating a “circumferential flow fill.” By increasing the gate size from 1.2mm to 1.8mm and reducing the melt flow rate (from 80mm/s to 50mm/s), the impact mark area was reduced by 80%. For complex logos, a latent gate can be used to feed the material from the non-exterior surface. For a laptop logo , a 0.8mm latent gate on the side aligned the melt flow with the logo’s texture, completely eliminating the impact mark and increasing the appearance acceptance rate to 99% . The gate location should be determined in conjunction with Moldflow simulation to ensure that the velocity gradient of the melt front when it reaches the logo area is less than 50 mm/s · mm .
Fine-tuning process parameters is crucial for improving impact marks, focusing on the coordinated control of melt temperature, mold temperature, and injection speed. A mirror-finished logo made of PC exhibited noticeable impact marks at a melt temperature of 260°C. Increasing the temperature to 280°C (still below the material’s decomposition temperature of 300°C) improved material fluidity by 30%, allowing the melt front to more easily adhere to the mold cavity, and reducing the impact mark depth from 0.03mm to 0.01mm. The mold temperature must be maintained at 80-100°C (for PC materials). In one case, a separate heating rod was installed in the logo area, keeping the temperature 10°C higher than the rest of the cavity. This slowed melt cooling and reduced the visibility of impact marks by 60%. A “stepped” injection speed control was employed: 30 mm/s initially (before filling the logo area), then reduced to 15 mm/s near the logo to avoid high-speed impact. Test data showed that this control method reduced the impact mark defect rate from 15% to 2%.
The mold cavity’s surface quality and venting design have a direct impact on improving the impact marks of mirror logos. Ultra-fine polishing and efficient venting can reduce melt flow resistance. The logo cavity surface roughness should be controlled below Ra0.02μm. Mirror polishing with diamond paste reduces frictional resistance during melt flow compared to conventional polishing (Ra0.1μm), reducing the probability of impact marks by 50%. A 0.01mm deep venting groove (5mm wide) is installed in the dead corner of the logo edge. Combined with vacuum-assisted venting, this reduces the residual air content in the cavity from 8% to 2%, preventing melt disturbance caused by gas obstruction. By adding venting grooves to a certain automotive steering wheel logo, the bubble defect associated with impact marks has been eliminated. Furthermore, a TiN coating (HV2000 hardness) is applied to the cavity surface to reduce melt wear, ensuring impact mark stability for over 100,000 mold cycles.
Material modification and additive addition are auxiliary means of improving impact marks. By increasing the material’s toughness and fluidity, they reduce stress concentration during melt impact. Adding 0.5% silicone flow modifier to PC material can reduce melt viscosity by 15%, making it easier for the melt to adhere to the mold cavity surface. The impact mark level on a mirrored logo was reduced from level 3 (clearly visible) to level 1 (slightly visible). For ABS material, a high-rubber content grade (25% rubber content) was selected. The rubber particles absorb impact energy and reduce stress whitening during melt impact. This resulted in a 70% improvement in impact marks on a home appliance panel logo. It’s important to avoid excessive additive addition. In one case, a silicone content exceeding 1% resulted in precipitates on the logo surface. Ultimately, a 0.3-0.5% content was determined to be the optimal range. In addition, the drying process of the material needs to be strictly controlled. A PA66 mirror logo had excessive moisture content (0.15%), which led to fluctuating melt fluidity and unstable impact marks. After drying to a moisture content of 0.03%, defect stability improved, and the defect rate fluctuation dropped from ±5% to ±1%.
