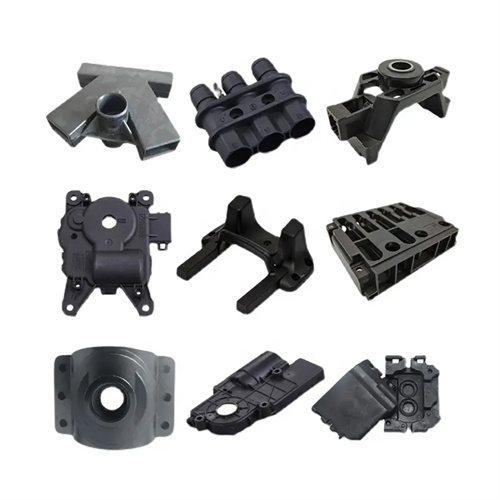
Injection mold design drawing inspection
Injection mold design drawing inspections must first review the rationality of the part model to ensure that the part structure meets the requirements of the injection molding process. This serves as the foundation for subsequent design. The part’s wall thickness should be uniform, with variations within 30%. For one part, the wall thickness suddenly changed from 2mm to 5mm, which was prone to sink marks and warping. The product designer was asked to modify the transition to a gradual transition (3mm → 4mm → 5mm). Corner radiuses should be sufficiently large (typically ≥ 0.5mm) to avoid stress concentration. A right-angle corner on one part caused cracking during mold trials, so the design drawing inspection required an additional 1mm radius. The draft angle should also be checked to ensure it meets requirements. The minimum draft angle varies depending on the material (ABS ≥ 1°, PC ≥ 1.5°). For one PC part, the draft angle was only 0.5°, but the design drawing inspection required an increase to 2° to prevent surface scratches during demolding. For plastic parts with assembly requirements, it is necessary to check whether the fitting clearance is reasonable. The fitting clearance of a certain snap-on design is 0.05mm, which is lower than the recommended 0.1mm. This may easily lead to assembly difficulties and the design needs to be adjusted.

The structural design of the cavity and core is central to the mold design drawing, ensuring the dimensional accuracy and appearance quality of the molded part. The cavity layout is reasonable. Multi-cavity molds should adopt a symmetrical or balanced layout. A four-cavity mold had uneven cavity center distances, resulting in a 1.2-second difference in fill time. During the design drawing review, the layout required adjustment to an equidistant layout. Are the cavity surface finish requirements clear? For example, mirror polish (Ra 0.02μm) or sandblasting (Ra 1.6μm) are required. The cavity of an optical lens mold lacked polishing requirements, requiring additional clarification during the inspection. Is the core fixing method reliable? If bolts are used, strength verification is required. A 50mm diameter core was secured with only two M6 bolts, which was insufficient. Four M8 bolts were required. Are the venting grooves in the cavity and core adequately designed? Their depth should be ≤ the material’s overflow value (e.g., PP ≤ 0.02mm). The venting groove depth of one mold was 0.05mm, which can easily cause overflow and needs to be revised to 0.015mm.

During the gating system design review, attention should be paid to the gate form, runner size, and layout to ensure smooth melt filling. Check whether the gate is positioned away from the exterior surface and stress-bearing areas. For one part, the gate was located in the front exterior area, resulting in noticeable marks. During the design drawing review, it was required to be moved to the side, non-exterior area. Check whether the gate size matches the part wall thickness, typically 0.5-0.8 times the wall thickness. A 2mm-thick part used a 1.8mm gate, which was too large and resulted in pressure retention difficulties. It was required to reduce it to 1.2mm. Check whether the runner cross-section is appropriate. Circular runners have the smallest specific surface area (highest efficiency). A mold using a trapezoidal runner (with the same cross-sectional area) had a 20% higher flow resistance than a circular runner. Modifications are recommended during the review. Check whether the hot runner system design is comprehensive, including the number of nozzles, diameter, and temperature control points. A four-cavity hot runner mold had inconsistent nozzle diameters, resulting in uneven filling. A standard Φ3mm nozzle diameter was required.
The cooling system design must be inspected to ensure uniform and efficient cooling to avoid deformation of the plastic part due to uneven cooling. Check the layout of the cooling water channels to ensure they follow the contours of the cavity, maintaining a distance of 15-20 mm from the cavity surface. In one mold, the water channels were 30 mm offset from the cavity, resulting in low cooling efficiency and requiring re-arrangement. Check the adequacy of the water channel diameter and number. The calculation formula is: total water channel cross-sectional area ≥ projected part area × 0.001. For a 100×100mm plastic part, a total water channel cross-sectional area ≥ 10 mm² (e.g., two Φ8mm water channels). In one mold, only one Φ6mm water channel was used; an additional channel was required. Check the layout of the water inlets and outlets to avoid short circuits. In one mold, the water inlet and outlet were located on the same side, leading to localized high temperatures. A diagonal arrangement was required. Check the correct specifications and positioning of the sealing rings. Nitrile-butadiene rubber with a temperature resistance of 120°C or higher should be used. In one mold, conventional rubber rings were used and were replaced with high-temperature-resistant types during inspection to prevent aging and leakage.

The design and inspection of the ejector and demolding mechanisms must ensure smooth, damage-free, and efficient demolding of plastic parts. Check the even placement of ejector pins, with spacing ≤100mm. A large flat plastic part had ejector pins spaced 150mm apart, resulting in deformation during ejection and requiring an increase in the number of ejector pins. Check the adequacy of the ejector pin diameter based on ejection force (typically ≥3mm). A 2mm diameter ejector pin on a plastic part was found to be insufficiently strong and prone to bending, requiring an increase to 4mm. For threaded plastic parts, the demolding mechanism is reasonable. For automatic thread removal, the motor power and transmission ratio must be checked. A demolding motor with an M10 thread had insufficient power, resulting in demolding difficulties and requiring a higher-power motor. Check the stroke of the inclined ejector and side core pull mechanisms. It should be 5-10mm greater than the undercut depth. A side core pull had an undercut depth of 8mm and a stroke of only 10mm, resulting in insufficient safety margin and requiring an increase to 15mm. Finally, check whether the overall size of the mold matches the injection molding machine, including the maximum mold thickness, minimum mold thickness, tie rod spacing, etc. The closing height of a certain mold exceeds the range of the injection molding machine, and the template thickness needs to be modified and rechecked.